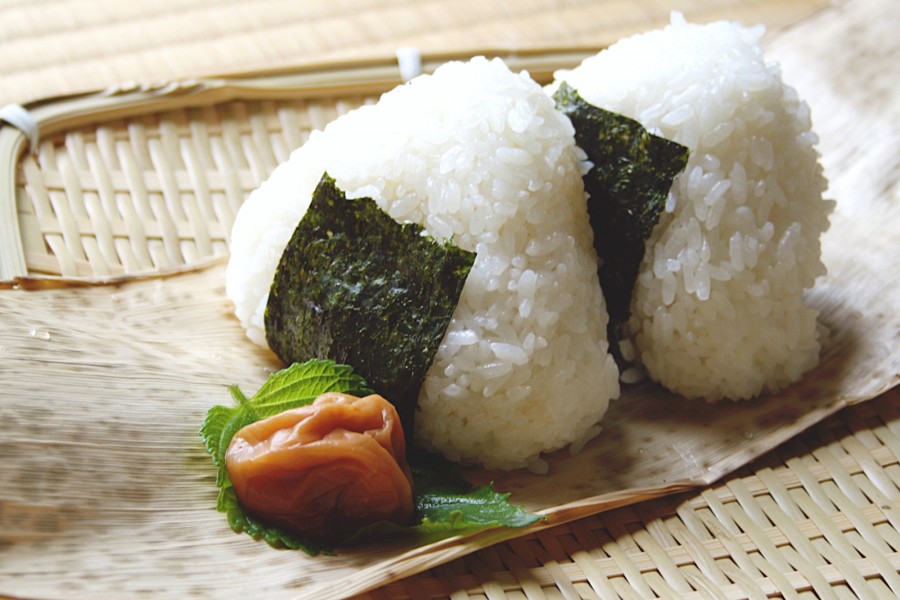
Onigiri is a rice ball which is both a comfort food and a to-go meal in Japan. It is a simple, light and savory food made from steamed rice with a filling inside and usually wrapped with nori (dried seaweed). You can fill an onigiri with anything, but the most common fillings in Japan are umeboshi (salted plum), kombu (seasoned kelp), and sake (grilled salmon). The rice used in onigiri is typically Japonica short rice, a short white grained rice.
Contents:
- What is Onigiri (Rice Balls)?
- Variation of Onigiri (Onigiri Fillings)
- 10 Most Popular Onigiri Fillings
- Let’s Make Onigiri! (Onigiri Recipe)
- How to Wrap Onigiri
- Umeboshi Onigiri and Shiozake (Salted Salmon) Onigiri Recipe
- Tenmusu (Shrimp Tempura Onigiri) Recipe
What is Onigiri (Rice Balls)?
The origin of onigiri goes back to Yayoi period, 3rd century BC to 3rd century CE, in Japan when people steamed rice and then grilled it. In the Heian period, during the 8th century, aristocrats served rice balls to their servants. The current style of onigiri with nori (dried seaweed) wrapped around it became popular during the mid-Edo period, in the 17th century.
In most of Japan these rice balls are called onigiri, but in some regions they are called omusubi. For onigiri, nigiri means “to grip” and the “o” is an honorific prefix, similarly in omusubi, musubi means “to tie or bond something,” with the “o” again an honorific prefix. You can see why these words refer to the shape of an onigiri. The rice in an onigiri is molded into four shapes, triangular, oval or round and tawara, a shape that looks like a bale of rice. Out of these four, triangle is the most common shape. The triangle shape resembles a mountain and symbolizes a connection with kami, Japanese nature gods.
In Japan, onigiri is available in grocery stores, convenience stores, and delis and even at restaurants. And of course, onigiri is made at home for lunch or even as a late night snack. In the U.S. you can find onigiri at Japanese restaurants or in any Japanese grocery store. If you want to start your Japanese culinary adventure, onigiri is a simple meal to make; just get some rice, put a filling inside and form it into a ball. With this simple technique, why not host your first onigiri party?
Variation of Onigiri (Onigiri Fillings)
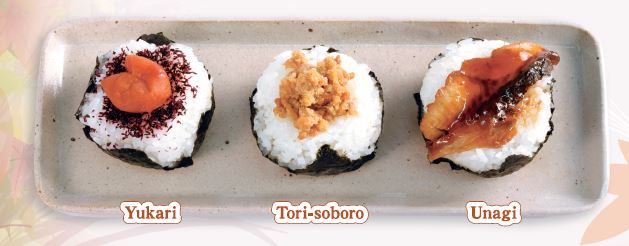
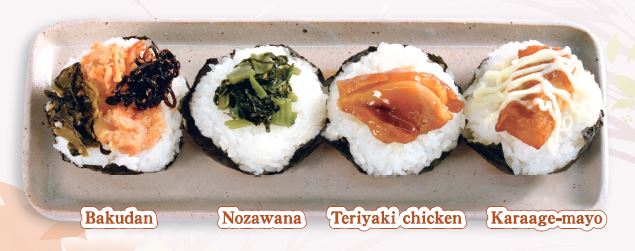
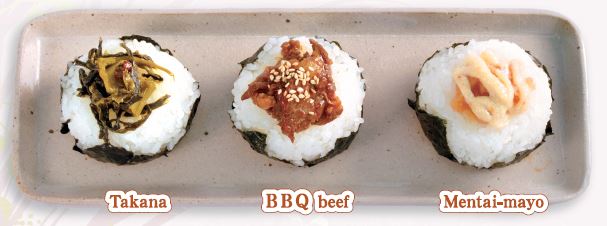
Introducing a new “no hard-pressing” onigiri series wrapped in soft nori (dried laver seaweed)! Using Nijiya’s organic rice, which retains its flavor even when eaten cold, these onigiri come with a variety of fillings. Of course, every piece is carefully made by hand.
So that “our customers may enjoy as many choices as possible,” we’ve selected the best ingredients among the favorite accompaniments to onigiri, such as unagi (eel), mentai mayo (cod roe with mayonnaise), takana (mustard greens), teriyaki chicken, BBQ beef, karaage mayo (fried chicken with mayonnaise), tori soboro (seasoned ground chicken), yukari (plocamium), nozawana (turnip greens) and buta kimchi (pork with kimchi). If you can’t pick just one, choose “bakudan,” which contains a combination of four ingredients.
Bring onigiri with you on your next trip to the beach, the mountains, or a theme park. With onigiri, you can enjoy a different lunch special every day!
10 Most Popular Onigiri Fillings
Onigiri is like a Japanese version of a sandwich. Just like a sandwich, onigiri is a popular lunch option and you can put anything in it. Wrap a nori (seaweed sheet) around your onigiri right before you eat it and so that you have a crispy nori when you bite into your onigiri. Here are the top 10 onigiri fillings you should try!
1. Tuna Mayo
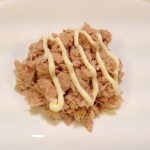 Tuna mayonnaise filling is easy to make and goes really well with rice. If you are not a big fan of seafood, you can substitute the tuna with chicken.
2. Sake / Shake (Grilled Salmon)
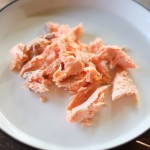 Shake, pronounced “sha-kay”, filling is easy to make. Grill or bake a salmon with soy or teriyaki sauce then break it into small chunks! It’s not only delicious but also a great source for protein, vitamin D, and omega-3 fatty acids!
3. Ume / Umeboshi
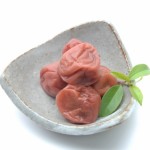 Ume, pronounced “ooh-may”, is a pickled plum and is very sour and salty. Umeboshi is not only a popular onigiri filling but preserves the onigiri, which makes this a great ingredient for packing in your lunch box.
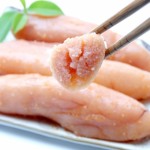
4. Mentaiko
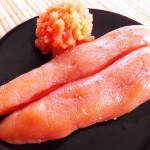 Mentaiko is fresh pollack or cod roe marinated with salt and spices. Mentaiko goes great with rice as well as pastas. If you like spicy, then try the karashi (spicy) mentaiko.
5. Tarako / Yaki tarako (Cod Roe / Cooked Cod Roe)
6. Kombu (Kelp)
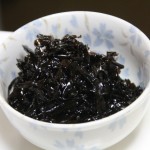 Kombu filling is made by a cooking method called tsukudani, which involves simmering kombu in soy sauce, cooking sake, mirin (sweet cooking sake) and sugar. If you don’t have all these items you can also substitute them with soy sauce and honey or agave.
7. Tenmusu (Tempura Shrimp)
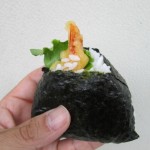 Tenmusu is an abbreviation of tempura and musubi. Musubi is another name for onigiri and in the tempura in tem-musu is fried shrimp. Tenmusu is a delicious onigiri that would be a popular item at any potluck. The crispy shrimp tempura goes so well with rice, such a brilliant idea, whoever thought of it!
8. Ebi Mayo (Shrimp Mayonnaise)
Ebi mayo filled onigiri is a prefect appetizer for potluck dinners. Cook fresh or frozen shrimp, cut them into small chunks and season them with salt, pepper and mayonnaise.
9. Okaka (Flavored Bonito Flakes)
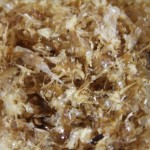 Okaka is a super easy filling you can make in a flash.
Okaka Recipe: Get a pack of bonito flakes at any Asian grocery store and mix it with a small amount of soy sauce, mirin (sweet cooking sake) and salt. You can also just use soy sauce and honey or agave.
10. Karaage (Fried Chicken)
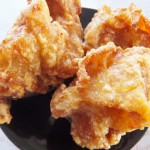 Karaage, pronounced “kara-agay”, is Japanese fried chicken. Cut the fried chicken into small pieces so that it fits in your onigiri. You can even use frozen chicken nuggets in your onigiri to make it even easier!
Let’s Make Onigiri! (Onigiri Recipe)
How to Wrap Onigiri
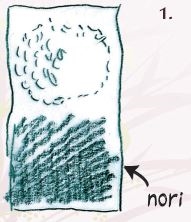 1. Put a sheet of onigiri nori (cut a whole nori sheet in half) on a cutting board, and create a mound of cooked rice (about 3.5 oz) over the top half of the nori.
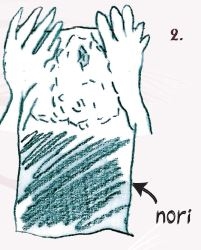 2. Wet your fingers and shape the rice into a triangle with a gentle touch. You can also make it into an egg shape if desired.
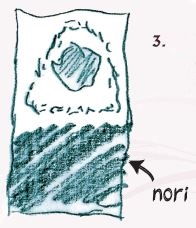 3. Create a hole in the center of the rice with your fingers.
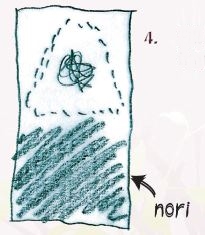 4. Fill the hole with your favorite ingredient.
 5. Fold over the bottom half of the nori to cover the rice.
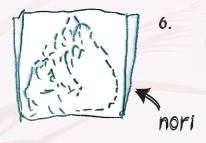 6. Fold the excess length of the nori over the rice at the top.
 7. Fold nori below along both sides of the triangle.
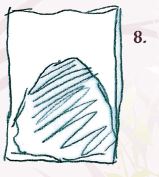 8. Your onigiri is complete. Put it in a plastic bag or clear wrap.
Because you didn’t squeeze hard to shape the rice, the nori may get slightly wet and wrinkled on the onigiri. But never mind how it looks. We guarantee your onigiri will never turn hard and will stay delicious even when eaten cold. Try it yourself!
Umeboshi Onigiri and Shiozake (Salted Salmon) Onigiri Recipe
The ancient people knew salt worked as natural preservative. They added salt to steamed rice and formed a triangular shape so that they could take rice for lunch and eat without chopsticks. Since then, onigiri has been loved as a portable lunch or snack. Fillings vary; from traditional fillings such as umeboshi* and shiozake**, to modern fillings such as teriyaki chicken and tuna.
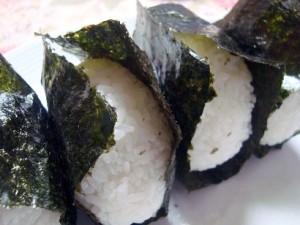
Ingredients (Serves 6 balls)
- 3 Japanese go cups (540 ml) rice, steamed with a tsp. of salt
*1 Japanese go cup = 180 ml
For fillings
- 6 pieces umeboshi*, seeded
- 6 tsp. furikake
For wrap
- 2 regular large (8×7.5-inch) sheets yakinori, cut in 1/3 to make 6 pieces which are 8×2.5- inch
Cooking Directions
Onigiri:
- SHAPE THE STEAMED RICE
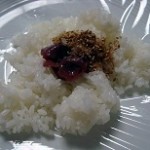
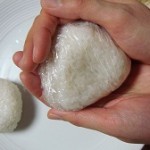
Lay plastic wrap on a plate, scoop about 1/2 cup of rice and place onto plastic wrap. Put an umeboshi and a teaspoonful of furikake in the center of rice.
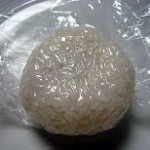
Wrap the fillings with rice and shape into a triangle.
There you go. - FINISH
Wrap onigiri with yakinori. Enjoy!
*Umeboshi:
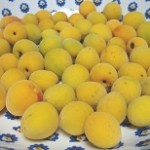
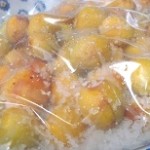
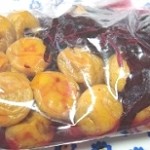
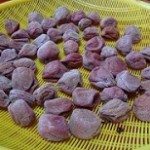
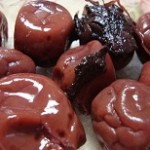
Umeboshi is a preserved food. Japanese apricots are salted, colored by red shiso leaves and dried. It is usually sold in plastic container packaged at Japanese supermarkets.
Here’s the process of making umeboshi.
- Get fresh Japanese apricots. Clean and dry.
- Salt the apricots for about 10 days.
- Add red shiso leaves to color. Check the weather forecast, dry the apricots and the shiso leaves outside for 3 days and nights.
- Sun-sanitize the liquid drew out from the apricots for about 1 hour.
- Three days later, combine the apricot, shiso leaves and some liquid, store in the fridge.
- Six months later, ready to eat.

**Shiozake:
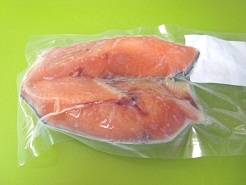
Shiozake is salted salmon. It is found in Japanese supermarkets, usually in the form of fillets. Whole shiozake is found in winter and is popular as a new year’s gift.
Here’s how to prepare the shiozake filling for onigiri.
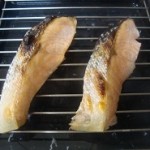
- Grill shiozake. Shiozake is already salted. You don’t need to salt this salmon before grilling.
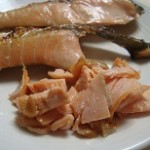
- Debone and crumble the shiozake by hands. The shiozake fillings are ready.
Recipe and photos by: Yasuko Muro
Tenmusu (Shrimp Tempura Onigiri) Recipe
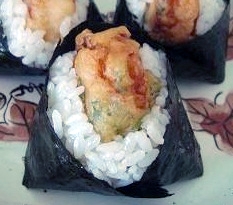
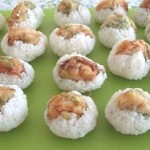
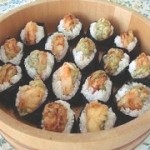
Tenmusu is an abbreviation of tempura and musubi, and musubi is another name for onigiri. The Nagoya region, in between Kanto and Kansai, is famous for its special local food. Tenmusu is a kind of onigiri, but the presentation is unique compared to the traditional onigiri. First, a big shrimp tempura sticks out through the rice. The other unique piece is that yakinori is wrapped as if it is a traditional Japanese robe “kimono” v-neck.
Ingredients (Serves 6 balls)
- 2 Japanese go cups (360 ml) rice, steamed with 1/2 tsp. salt
- 18 shrimp (3-inch large size)
For shrimp marinade
- 2 Tbsp. soy sauce
- 1 tsp. sesame oil
- 1 tsp. ginger juice (made by squeezing grated ginger)
For shrimp tempura batter
- 1/2 cups self raising flour
- 1/4 cups chilled water
- 5 leaves shiso (Japanese basil), cut into thin strips
For deep fry
- 2 cups white sesame oil
For wrap
- 3 regular large (8×7.5-inch) sheets yakinori, cut in 1/6 to make 18 pieces which are 8×1.2- inch
Cooking Directions
- PREPARE THE SHRIMP
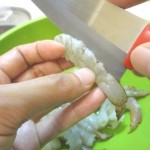
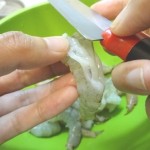
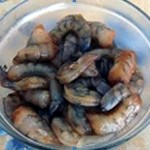
Remove the dark vein from the back; carefully slide a small knife down the back and make a shallow slit to expose the vein. Pull out the vein with the edge of the knife or with your fingers. Lightly rinse the shrimp in a large bowl of salted water. Pat the shrimp dry; wrap with cooking papers, let stand for 5 minutes to remove excess water from the shrimp. Marinate the shrimp with soy sauce, sesame oil and ginger juice more than an hour in the fridge. Then dry off extra marinade sauce with cooking papers. - MAKE THE TEMPURA BATTER
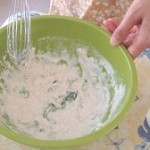
In a large bowl, combine self raising flour with very cold water. Then add shiso leaves to the bowl. - DEEP FRY
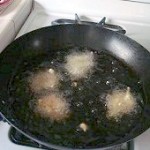
In an 11 inch wok a deep pan, heat 2 cups of oil to 350°F over medium heat.
Make sure the oil is appropriately heated by dropping a drop of batter. If the oil is appropriately heated, the batter drops once sink and then float in a second. If the oil is too hot, the drops do not sink.
Dip a piece of shrimp into the batter. Gently drop the shrimp into the wok, repeat dip and drop by one piece, deep fry until it reaches a golden color, 3-4 pieces each time. - DRAIN EXCESS OIL
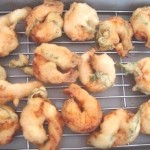
Transfer the shrimp tempura onto a rack lined sheet tray with tongs to drain excess oil.
To avoid oil splashing, make sure the tongs are not wet before using. - MAKE ONIGIRI
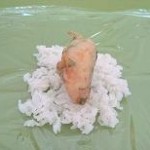
Lay plastic wrap on a plate. Scoop about 2 Tbsp. of rice, place in a thin circle onto the plastic wrap.
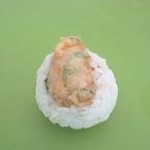
Put a piece of shrimp tempra in the center of the rice. Wrap the shrimp with rice and shape into a cone.
There you go. - FINISH
Wrap the onigiri with yakinori. Make it look like the v-neck of a kimono.
Recipe and photos by: Yasuko Muro
